
Why Did I Wait So Long to Learn How to Use Keurig Coffee Maker?
I still remember the first time I stared at my shiny new Keurig coffee maker like it was a spaceship. I had just unboxed it, excited to skip the messy filters and grounds from my old drip machine. But as soon as I saw the buttons and pods, I froze.
I thought, “How complicated can this be?” Turns out, it’s not complicated at all — once you know how to use a Keurig coffee maker properly.
Now that I’ve mastered it, my mornings run smoother than ever. If you’ve just bought one or want to finally use it right, let me walk you through my simple, foolproof routine that makes every cup taste like a mini café experience.
What’s the First Thing to Do When Setting Up Your Keurig Coffee Maker?
Before you brew your first cup, you need to give your Keurig a little warm-up. Think of it like stretching before a workout — it helps everything flow smoothly.
First, I remove the water reservoir and rinse it thoroughly. You don’t want any plastic dust from packaging sneaking into your coffee. Then, I refill it with fresh water — never distilled — up to the MAX line and place it back on the brewer. After plugging in the machine, I hit the power button and let the water heat up for a few minutes.
Once the light shows it’s ready, I grab a large mug, place it on the drip tray, lift and lower the handle (without inserting any pod), and press the brew button for a cleansing cycle. That first cup of hot water goes straight down the sink, but it ensures your next one tastes amazing.
How Do You Actually Brew Coffee with a Keurig?

This is where the magic happens — and honestly, it’s faster than waiting for your toast to pop.
I always make sure there’s enough water in the reservoir for the cup size I want. If you’re using a smaller model like the K-Mini, just pour in the exact amount you need for that brew. Then, I place my favorite mug on the drip tray (or remove the tray if I’m using a tall travel mug).
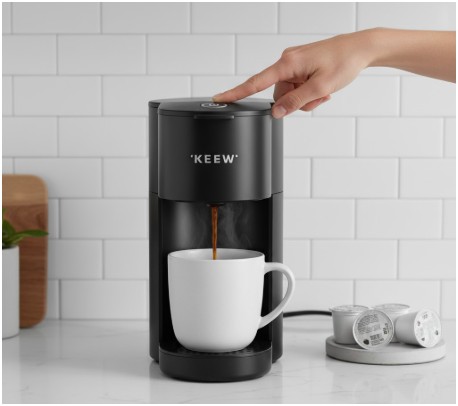
Next comes the fun part: inserting the K-Cup. I lift the handle, pop in the pod, and close it firmly. You’ll hear the needles puncture it — that’s your cue it’s ready to go. I usually pick an 8 oz or 10 oz brew size depending on how strong I want my coffee. Some models even have a “Strong” button, which I swear by when I need that extra morning kick.
Once I press the brew button, the machine hums and gurgles for about a minute before filling my mug with fresh, aromatic coffee. Then, I remove the mug carefully (it’s hot!) and toss out the used pod.
Can You Use Your Own Coffee Grounds in a Keurig?

Absolutely — and this is one of my favorite Keurig hacks. I love experimenting with local roasts, and using my own grounds lets me enjoy them without buying K-Cups for everything.
You just need a reusable K-Cup filter, which fits right where the pods go. I fill it with medium-ground coffee (never too fine), making sure not to pack it tightly. A light, even fill gives the best brew. Then I close the lid, insert it like a regular pod, and brew as usual.
The result? A fresher, more personalized cup — plus, it’s eco-friendly since you’re not throwing away plastic pods each time.
How Do You Keep Your Keurig in Great Shape?
Coffee oils, minerals, and buildup can mess with your flavor if you don’t clean your Keurig regularly. I like to give mine a little TLC once a week.
I start by rinsing the removable parts — the reservoir, lid, and drip tray — with warm, soapy water. Every few weeks, I run a cleansing brew with just water to flush out any residue.
If you live in an area with hard water (like I do), descale the machine every 3–6 months using a Keurig descaling solution or white vinegar mix.
Trust me, this simple routine keeps your coffee tasting fresh and prevents those annoying brewing errors.
Quick Reference: Daily Keurig Routine
| Step | Action | Why It Matters |
| 1 | Fill the reservoir with fresh water | Avoid stale-tasting coffee |
| 2 | Place mug on drip tray | Keeps your counter clean |
| 3 | Insert K-Cup and close handle | Punctures pod for brewing |
| 4 | Select cup size and press brew | Controls flavor strength |
| 5 | Discard used pod | Keeps machine unclogged |
FAQs About How to Use Keurig Coffee Maker
1. Can I leave water in the Keurig overnight?
Yes, but I prefer to change the water daily. Fresh water means fresher-tasting coffee. If you don’t use it for a couple of days, empty and rinse the reservoir before brewing again.
2. Why is my Keurig not brewing a full cup?
That’s usually due to mineral buildup in the internal tubes. A quick descaling with vinegar or Keurig’s descaling solution usually fixes it. Also, check that your K-Cup is punctured properly on both ends.
3. Can I use milk instead of water in the reservoir?
Never do that — milk can clog your Keurig and ruin it. If you want a latte-style drink, brew your coffee first, then add steamed milk separately.
4. How often should I clean my Keurig?
Wipe it daily, rinse removable parts weekly, and descale every few months. The cleaner you keep it, the better your coffee tastes (and the longer your machine lasts).
Coffee Bliss Starts with Simplicity
Learning how to use Keurig coffee maker changed my mornings completely. What used to be a groggy, half-asleep ritual now feels like a treat. There’s something oddly satisfying about pressing a single button and hearing that little hum before the rich aroma fills the kitchen.
If I can give one final tip — don’t overthink it. Keep your water fresh, clean your brewer regularly, and try a few different pods until you find your signature flavor. After that, your Keurig will become your best (and most reliable) morning companion.