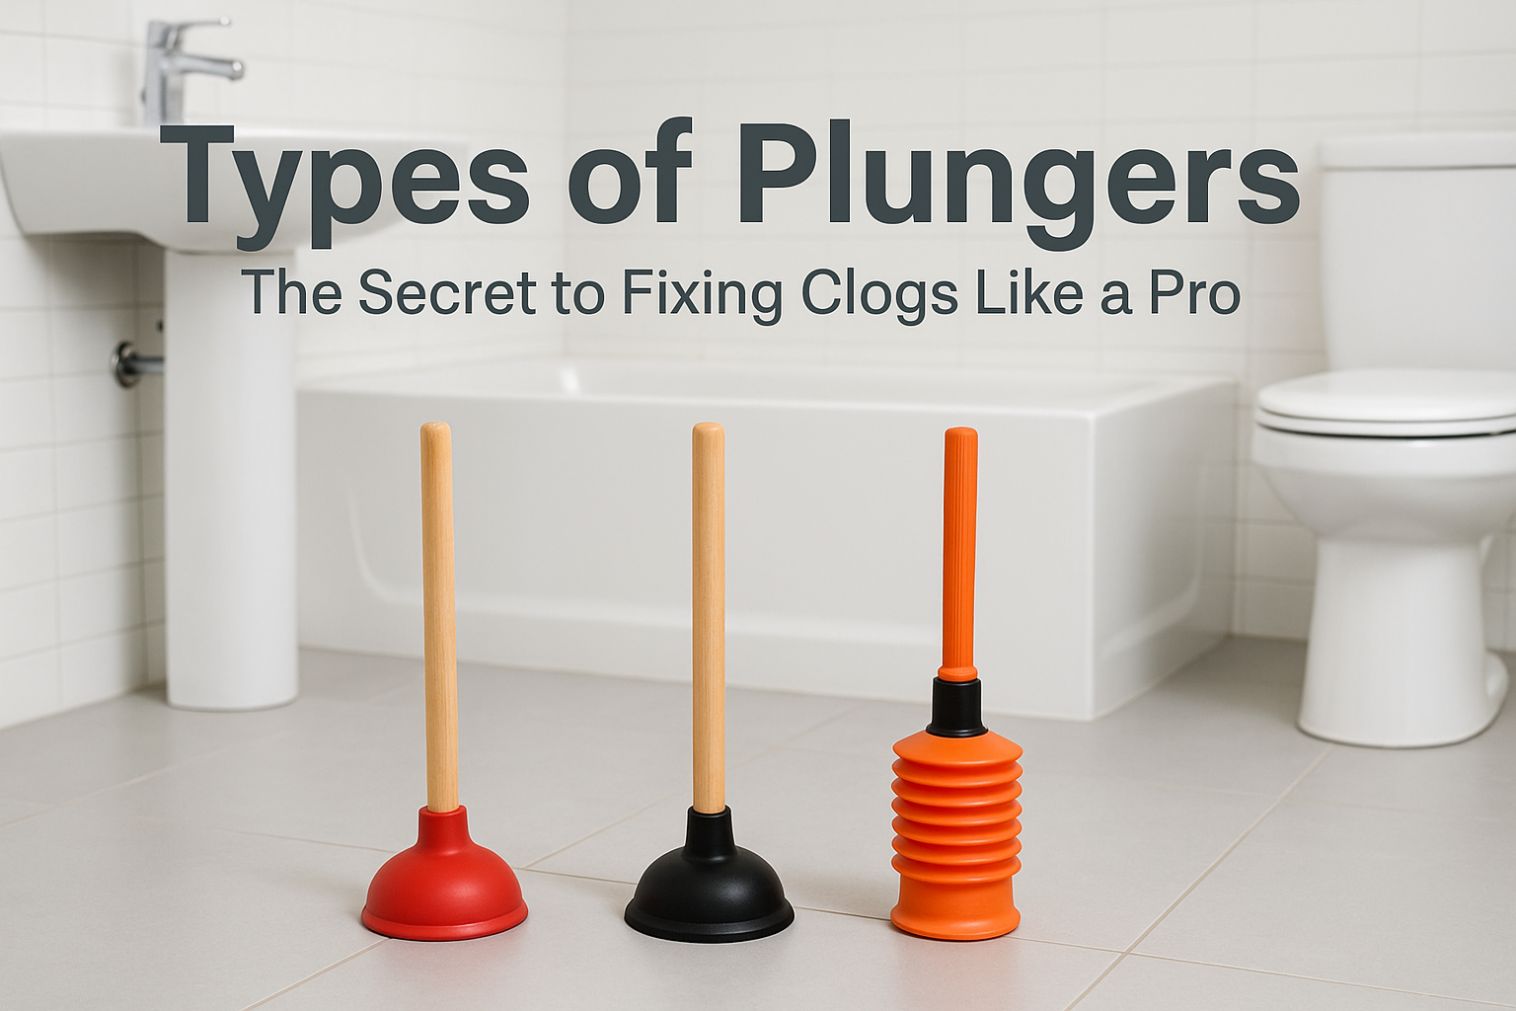
I still remember the first time I faced a clogged toilet—it was after a big family dinner, and the plunger I had looked like something from a bad cartoon. I stood there, clueless, wondering if all plungers were the same. Spoiler: they’re not. Learning about the types of plungers actually changed the way I handle household emergencies (and saved me from a few embarrassing moments).
Over the years, I’ve realized most people don’t know there’s more than one kind of plunger—or that using the wrong one can make things worse. So, let’s talk about what really works, what doesn’t, and how you can handle any clog like a seasoned pro.
What Are the Main Types of Plungers and How Do They Work?
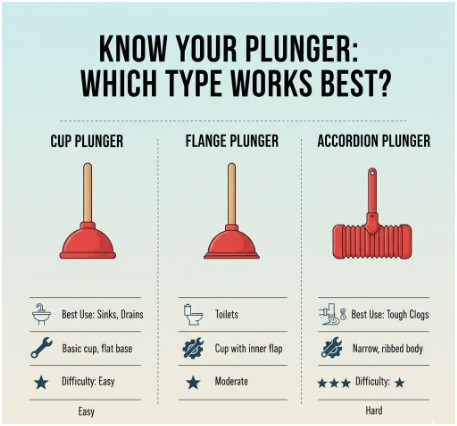
There are three main types of plungers most households should know: the cup plunger, the flange plunger, and the accordion plunger. Each one serves a different purpose depending on the type of drain you’re dealing with.
Cup Plunger (Sink Plunger): This is the classic one we all picture—a simple rubber cup attached to a handle. It’s perfect for flat surfaces like sinks, bathtubs, and showers. The flat bottom forms an airtight seal over the drain, creating enough suction to loosen clogs. But here’s the thing: it doesn’t work on toilets. The curved drain of a toilet prevents it from sealing properly.
Flange Plunger (Toilet Plunger): This one looks similar but has an added flexible rubber flap—called a flange—hanging from the bottom of the cup. That little extension fits perfectly into the curved drain of your toilet, creating a powerful seal. You can even fold the flange back in if you ever need to use it on a sink (just wash it thoroughly first!).
Accordion Plunger (Bellows Plunger): This one means business. Made of sturdy plastic, it’s designed like an accordion to generate maximum pressure. It’s great for tough toilet clogs but can be tricky to maneuver. Also, its rigid material might scratch your porcelain bowl if you’re not careful.
Which Type of Plunger Should You Keep at Home?
If you want to avoid plumbing disasters, having the right tool ready matters more than you think. Most people make the mistake of using one plunger for everything—don’t do that.
For everyday household needs, you should keep at least two plungers: one for sinks and one for toilets. The cup plunger handles kitchen and bathroom drains, while the flange plunger is your best friend for toilets.
If your home has a history of stubborn blockages, the accordion plunger is worth adding to your arsenal. It delivers incredible force with minimal effort. Just remember—it’s a workout the first few times until you get the hang of it.
Here’s a quick table comparing them side by side:
| Type of Plunger | Best For | Design Features | Ease of Use | Extra Notes |
|---|---|---|---|---|
| Cup Plunger | Sinks, tubs, showers | Flat rubber cup | Very easy | Needs flat surface to seal |
| Flange Plunger | Toilets | Cup with foldable rubber flap | Easy | Can double for sinks (if sanitized) |
| Accordion Plunger | Tough toilet clogs | Rigid plastic bellows design | Moderate | May scratch bowl if mishandled |
Are There Other Types of Plungers Professionals Use?
Absolutely. While most of us stick to basic household plungers, plumbers have access to a couple of specialized tools that go beyond home use.
The Beehive Plunger is a modern, hybrid version designed with a flexible, wide head that works on both flat and curved drains. It’s like a universal adapter for your pipes—great for people who want one plunger to rule them all.
Then there’s the Taze Plunger, a heavy-duty, professional-grade tool built for commercial plumbing systems. It uses a long metal rod with a disc at the end to push out deep or industrial clogs. You won’t find it in a regular household because it’s meant for big jobs, not casual DIY fixes.
How Do You Use the Right Plunger Correctly?
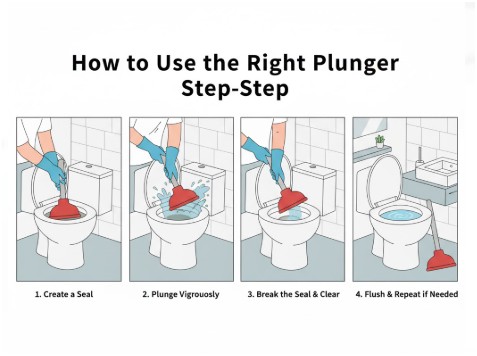
Using a plunger looks simple, but there’s a method to the madness. Here’s how I handle it whenever a clog tries to ruin my day:
1. Choose the right plunger.
Use a cup plunger for sinks or tubs and a flange (or accordion) plunger for toilets.
2. Add some water.
If the drain is dry, add enough water to submerge the plunger’s cup. Water helps create suction and pressure.
3. Form a tight seal.
Press the plunger firmly against the drain opening so that no air escapes. This step is key—it’s what makes the suction work.
4. Use steady, strong pushes.
Push down slowly and then pull up sharply, keeping the seal intact. I usually do about 10–15 thrusts before checking if the water drains.
5. Test the results.
If the water starts to swirl down smoothly, congratulations—you just fixed the clog. If not, repeat the process or consider calling a plumber for severe blockages.
FAQs About the Different Types of Plungers
Q1. Can I use the same plunger for the toilet and sink?
Technically, you can—but you shouldn’t. Toilets require a flange or accordion plunger for a proper seal, while sinks work best with a cup plunger. Also, for hygiene reasons, always keep separate plungers for each.
Q2. Why doesn’t my plunger work even when I use the right one?
If the seal isn’t tight or there’s too little water, your plunger won’t generate enough pressure. Check the water level and make sure the rubber cup fully covers the drain.
Q3. Are accordion plungers worth the effort?
Yes, but only if you deal with frequent, tough toilet clogs. They’re powerful, but they take practice. I recommend sticking with a flange plunger for everyday needs.
Q4. How do I clean and store my plunger?
After using it, soak it in a mix of hot water and disinfectant for a few minutes. Rinse thoroughly and let it dry before storing it in a bucket or a designated bathroom corner.
Plunge With Confidence—You’ve Got This!
Here’s my golden rule: treat your plunger like a superhero tool, not a last resort. Once you understand the types of plungers and how they work, you’ll never feel helpless facing a clog again. I can’t count how many times the right plunger saved me from late-night plumbing calls and potential disasters.
So next time you see one sitting quietly by the toilet, give it some respect—it’s the unsung hero of home maintenance.
Pro tip: Keep both a cup and flange plunger handy. Trust me, it’s a small investment that pays off every time something decides not to “go with the flow.”